
Your Gunholder comes pre-packaged and ready to mount out of the box. There are some slight modifications you can make depending upon your vehicle make and model. However the great thing about The Gunholder is that once adjusted, you can use it for the weekend hunting, but come the weekday you can remove it instantly until the next hunt. The Gunholder does not require any drilling or mounting adhesive, the mount is securely locked into place with velcro and tightening the pressure screws to fit.
No matter The GunHolder location - front or back seat, your gun now will be in a quick and easily accessible location ready for all your hunting needs.
Step One
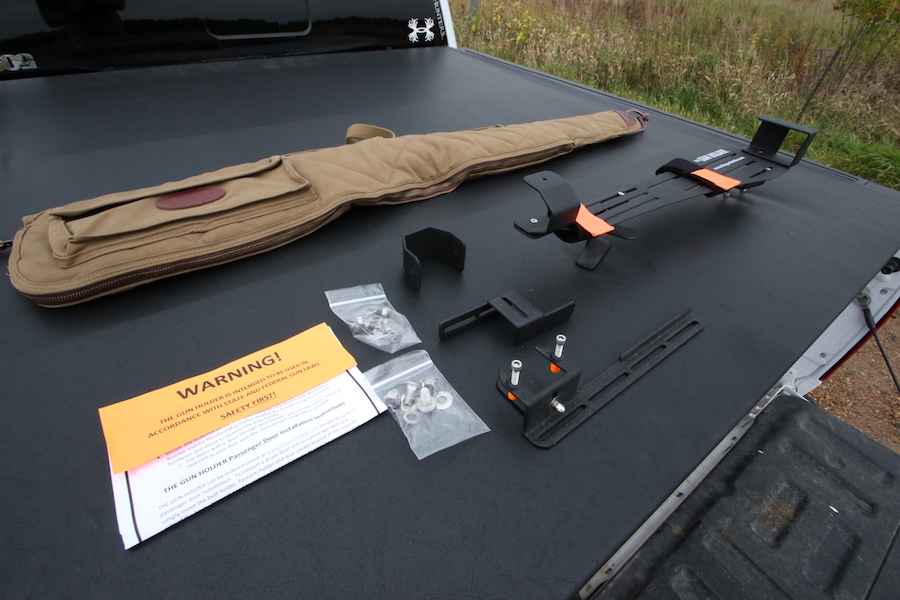 Once opening the box you will find your Gunholder comes pe assembled for most vehicles. Due to ease of packaging, we have compacted The Gunholder into a straight unit, but loosening the screws and rotating the top door handle mount and the bottom door pocket mount into into place. If the model of your vehicle requires, we have included the extra mounts to allow different configurations of vehicle doors.
Step Two
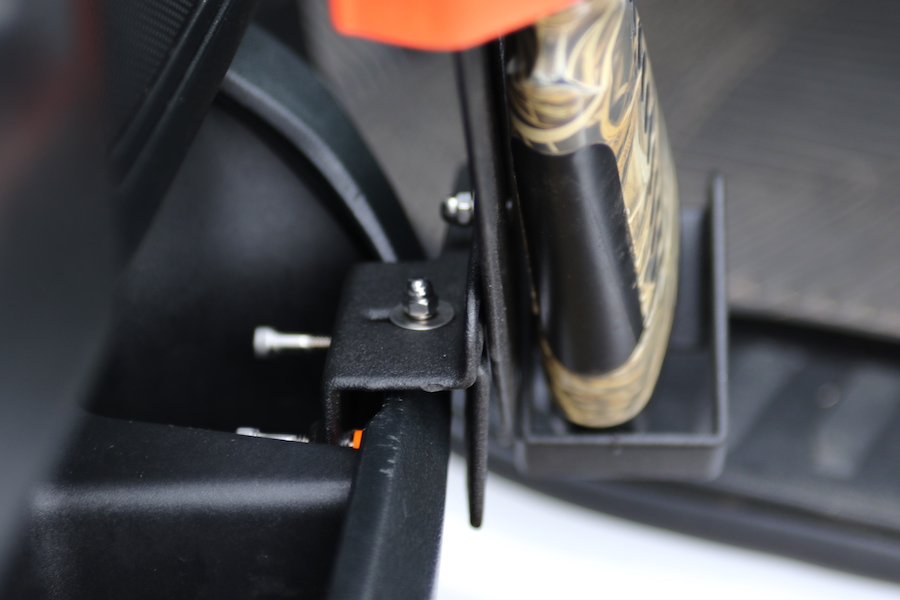 The bottom door pocket mount is where you want to start. This is because you will want to tighten down the adjustable pressure screws as much as possible, but enough that you can fit inside the screw side inside the door pocket. Depending on your model of vehicle this can be a tight location to access. Once you get the bottom door mount in place, tighten screws to door pocket molding ensuring a tight snug fit. Ideally you want to move your bottom mount as forward as possible to allow the gun, once placed run diagonally across the door.
Step Three
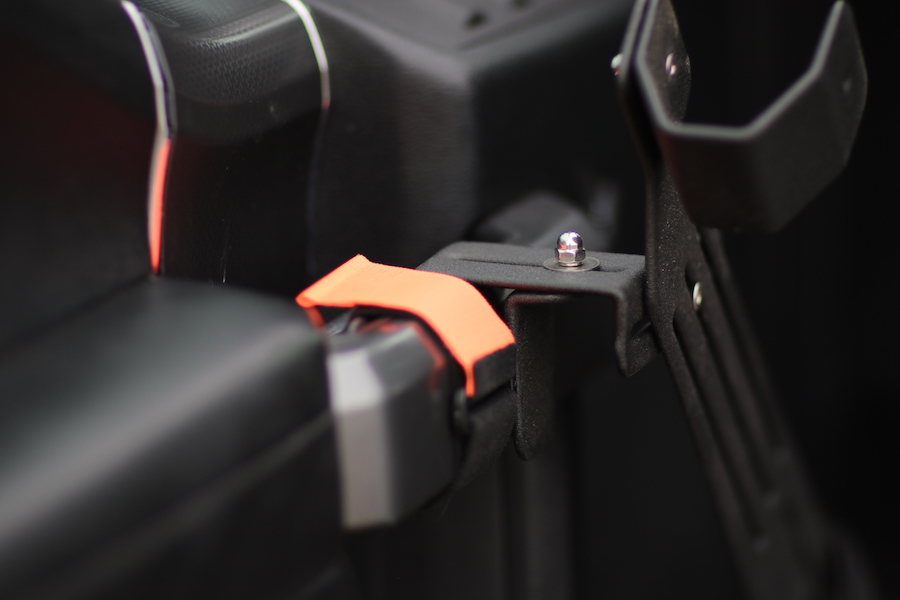 On the top door mount you will see there is a bracket that needs to be adjusted to the thickness of your door handle. You can adjust the mount accordingly and once you feel that it is snug, tighten the installed screws to keep the mount from moving. To secure this top door handle mount into place, take the smaller provided velcro strap snugly around your door handle and Gunholder mount.
Step Four
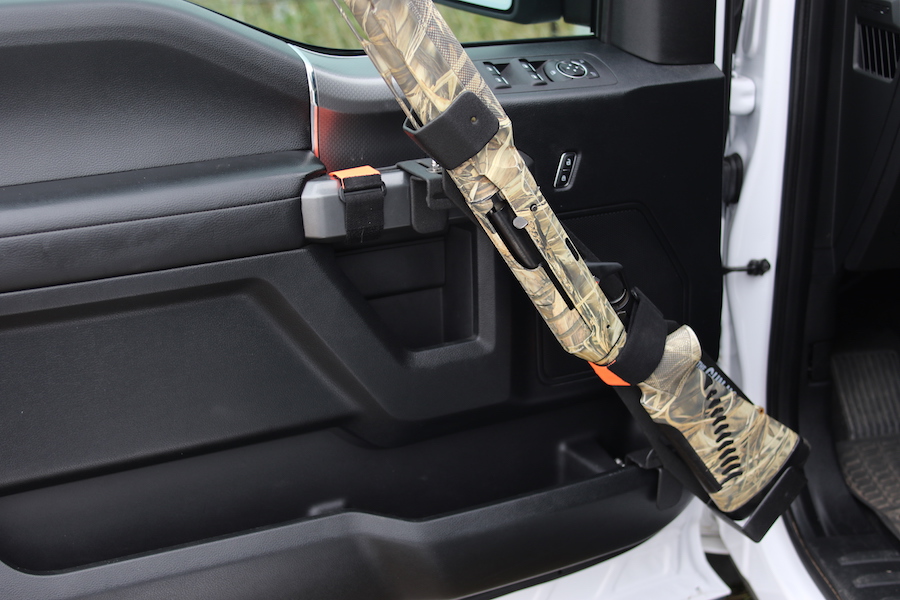 Ensure all mounting brackets are snug and you can now adjust the mounts using the provided allen wrench tool. We have found clients in the past have adjusted the locations of the screws to firm up the mount to the door. This mount relies on pressure and the more snug you have this mount the better experience you will have with the gun feeling secure.
Step Five
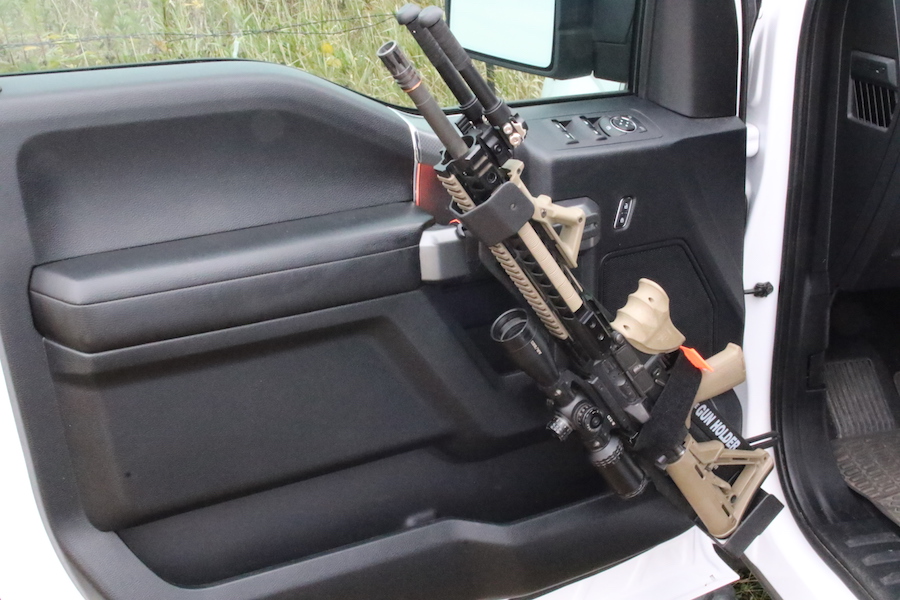 Place your firearm in The Gunholder - again top rest can be adjusted per firearm you wish to use. Most use The Gunholder for shotgun or rifle applications, but many clients have now used their holder for compact rifles as well. Once you feel your gun is secure, and in a comfortable position, to secure your gun to the holder, unstrap the larger velcro strap to go around your gun and securely fastened to the holder.
Step Six
Enjoy
